
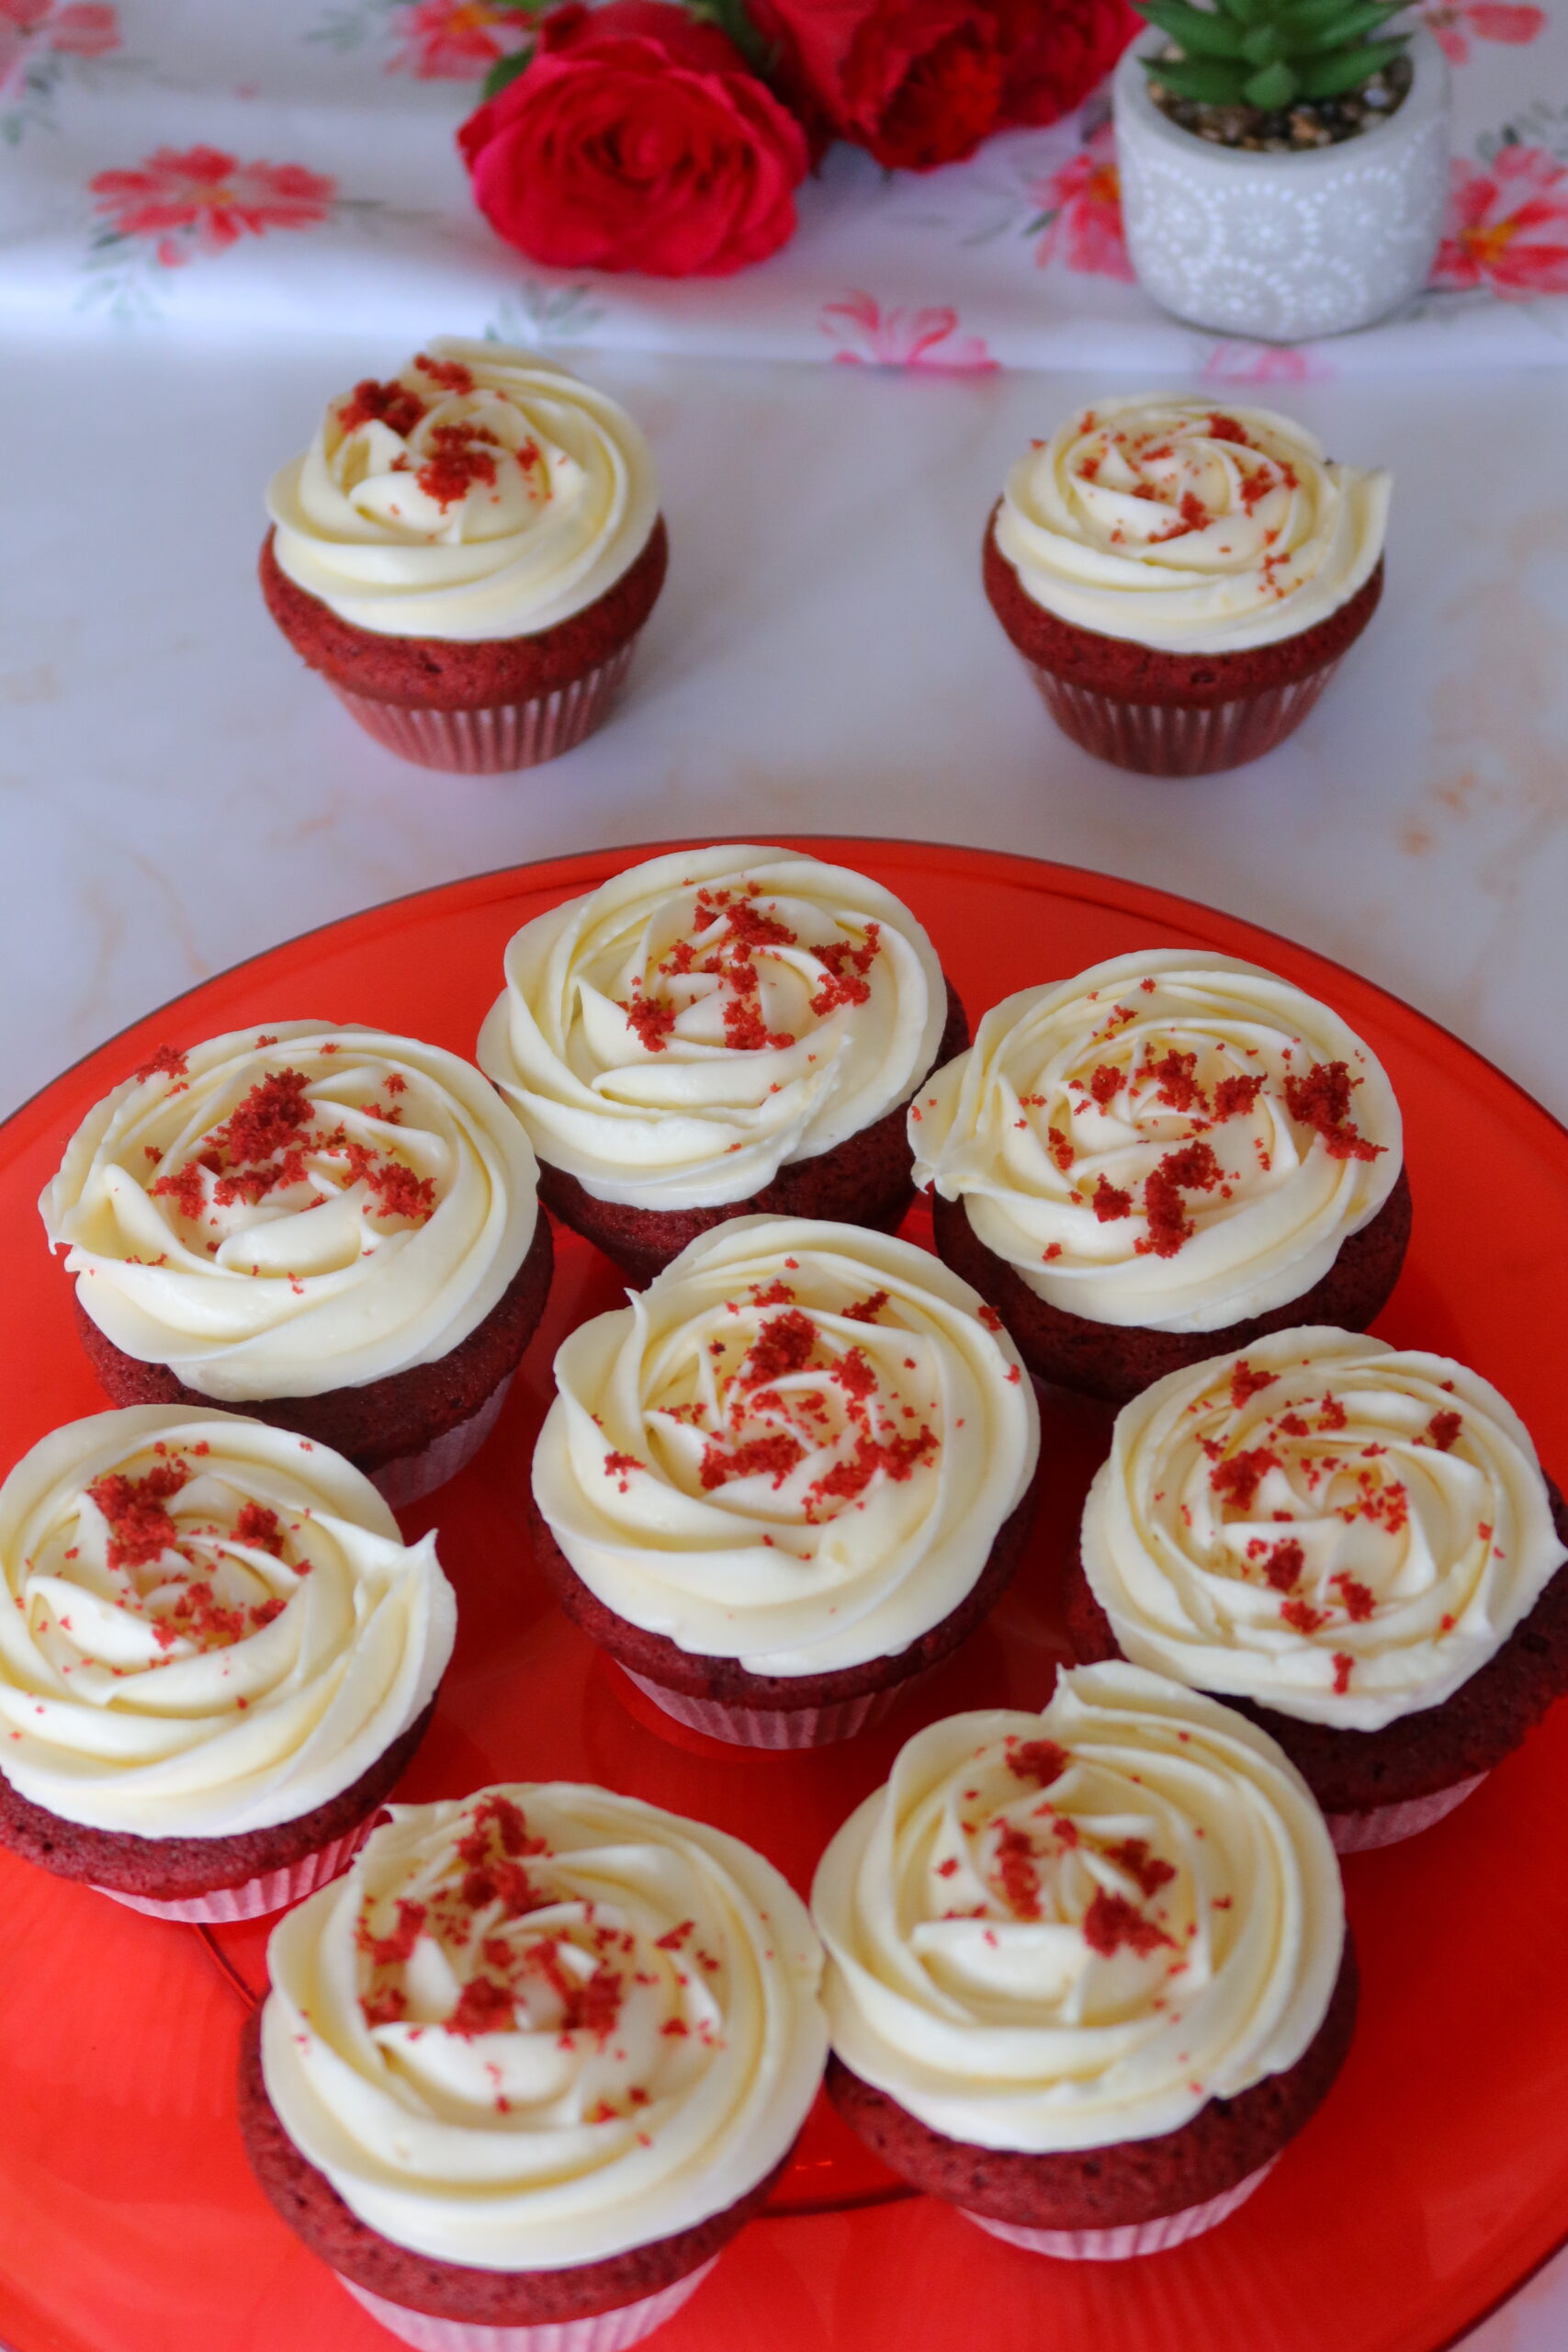
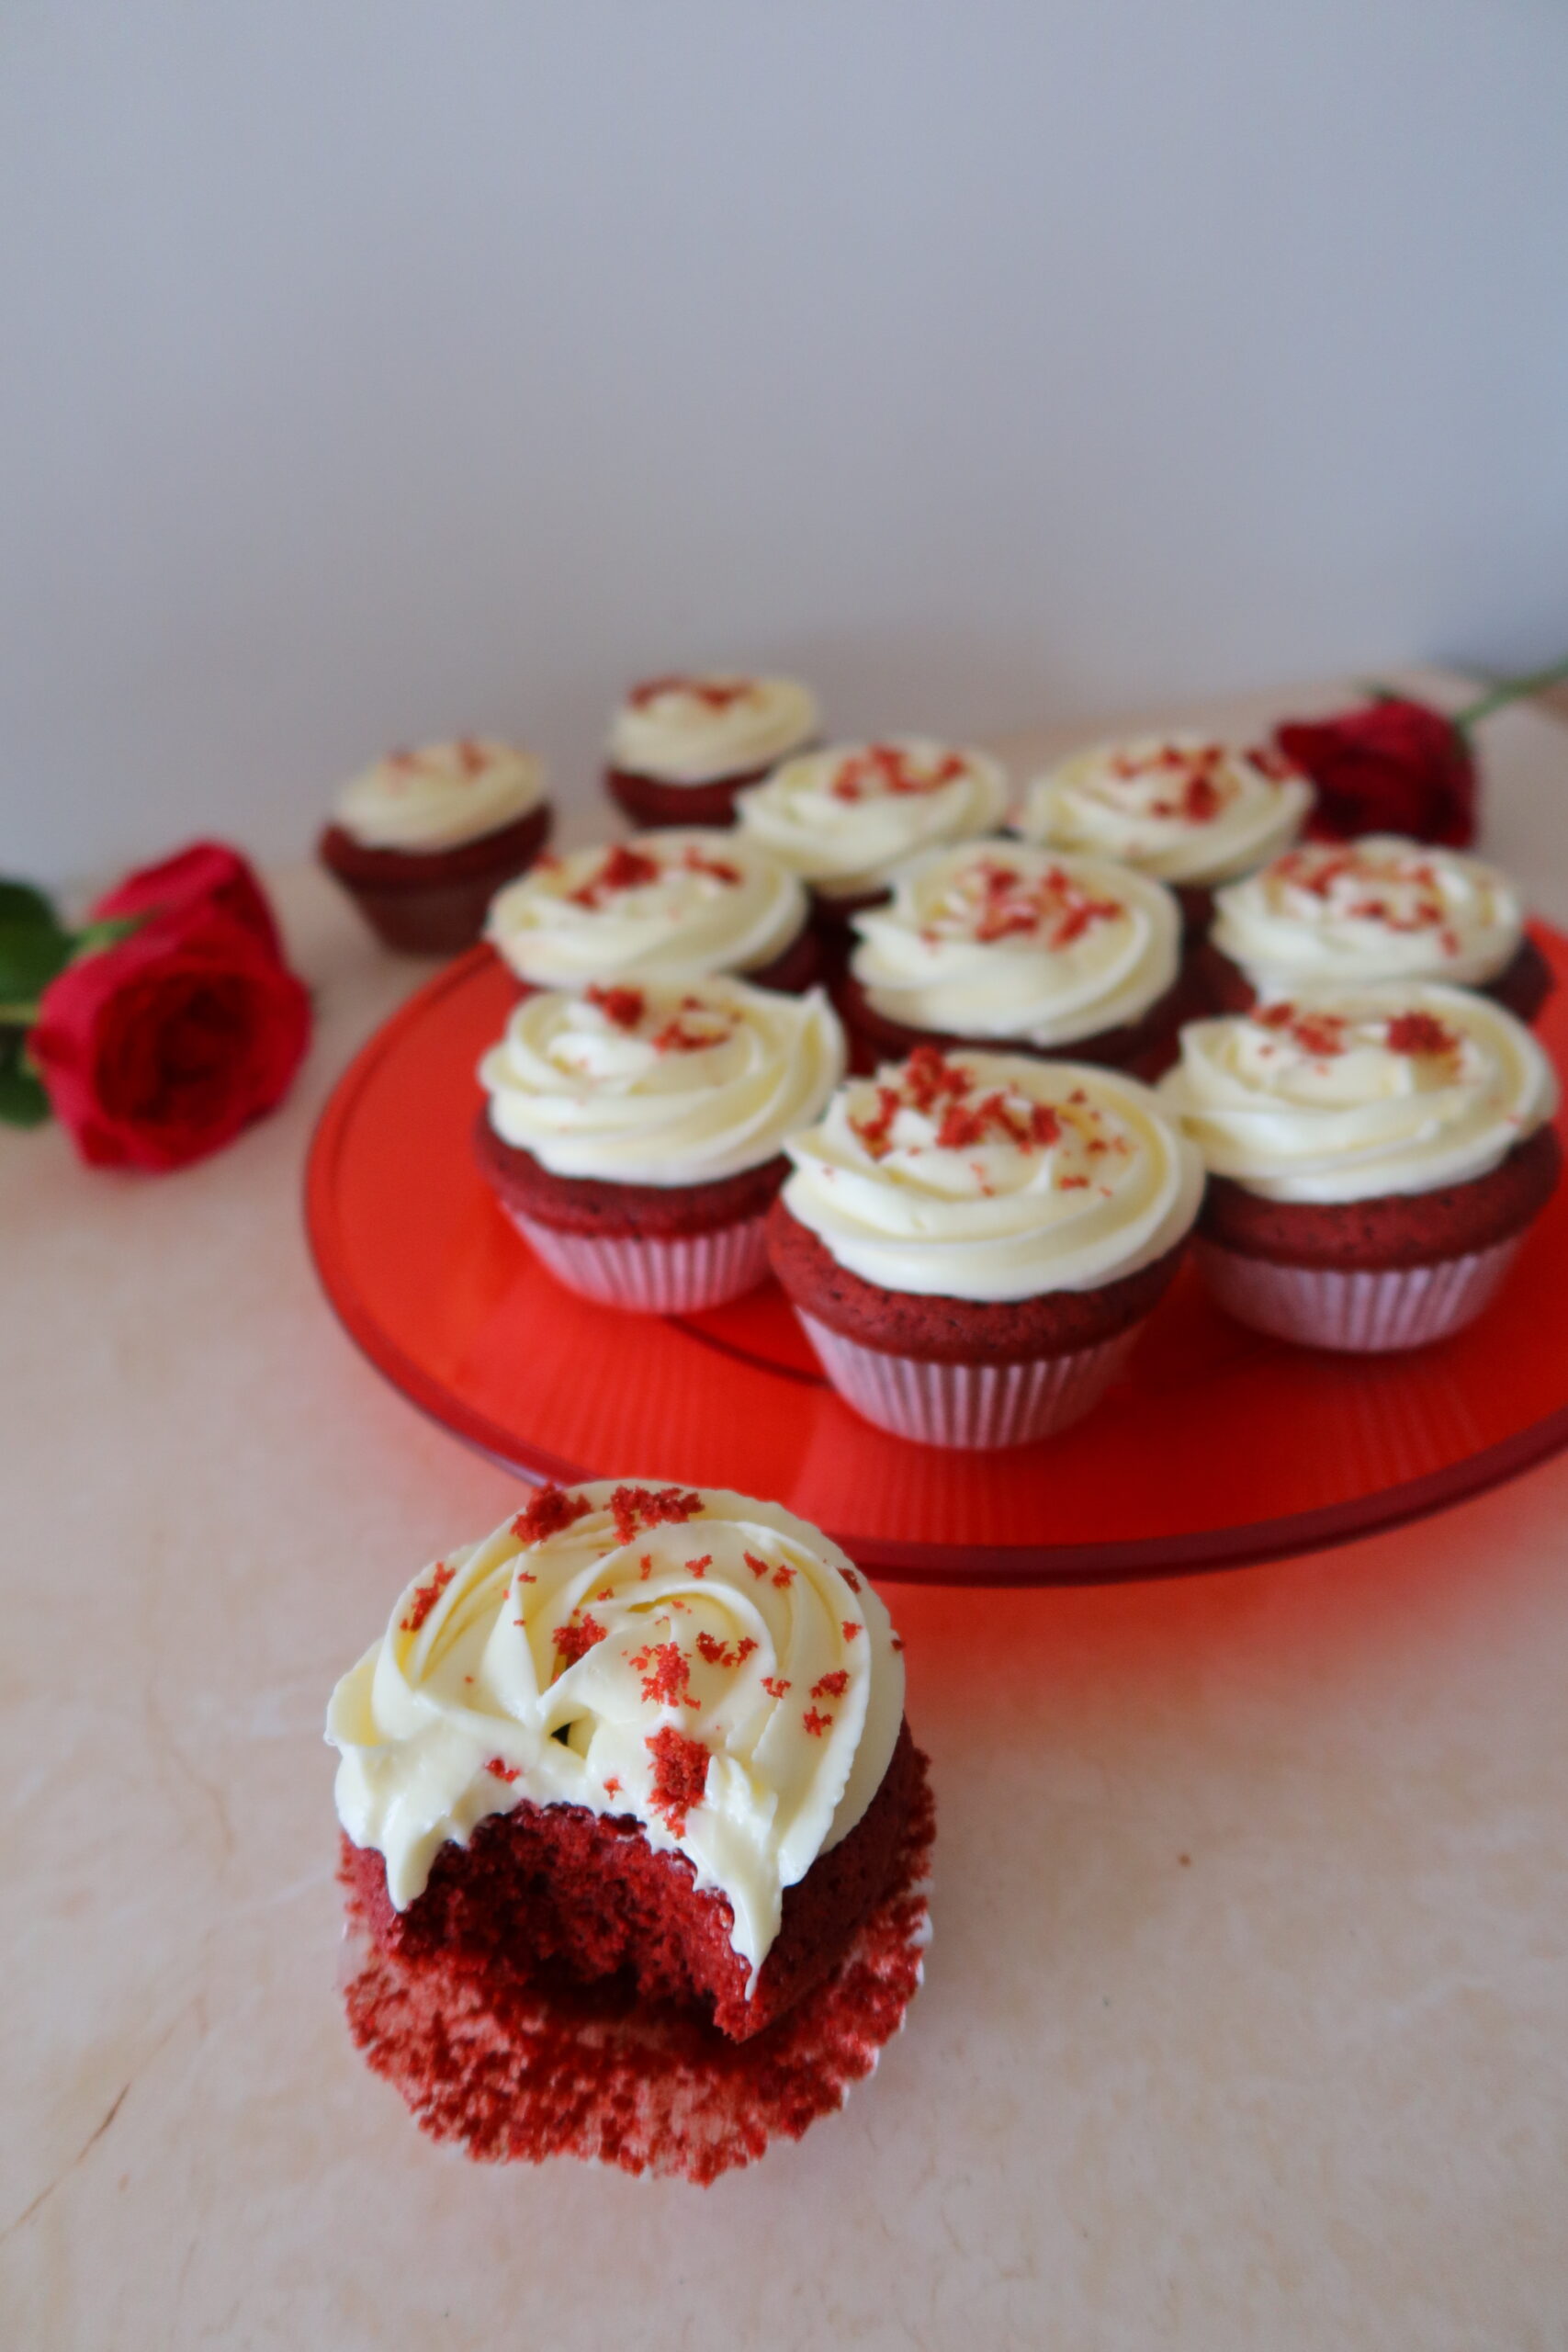
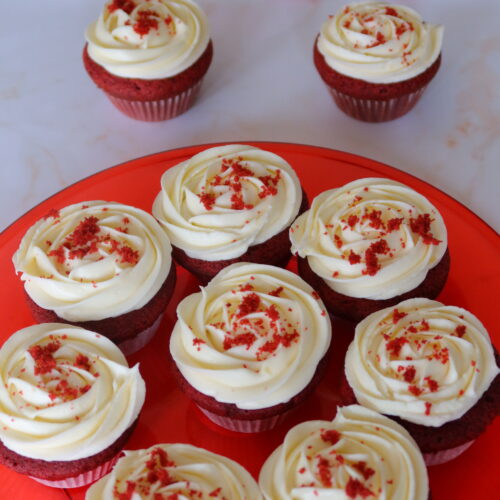
These Homemade Red Velvet Cupcakes are a classic dessert known for their striking deep red hue and velvety texture. Traditionally made from a combination of cocoa powder, buttermilk, and vinegar, these cupcakes offer a subtle chocolate flavor which pair with a tangy cream cheese frosting.

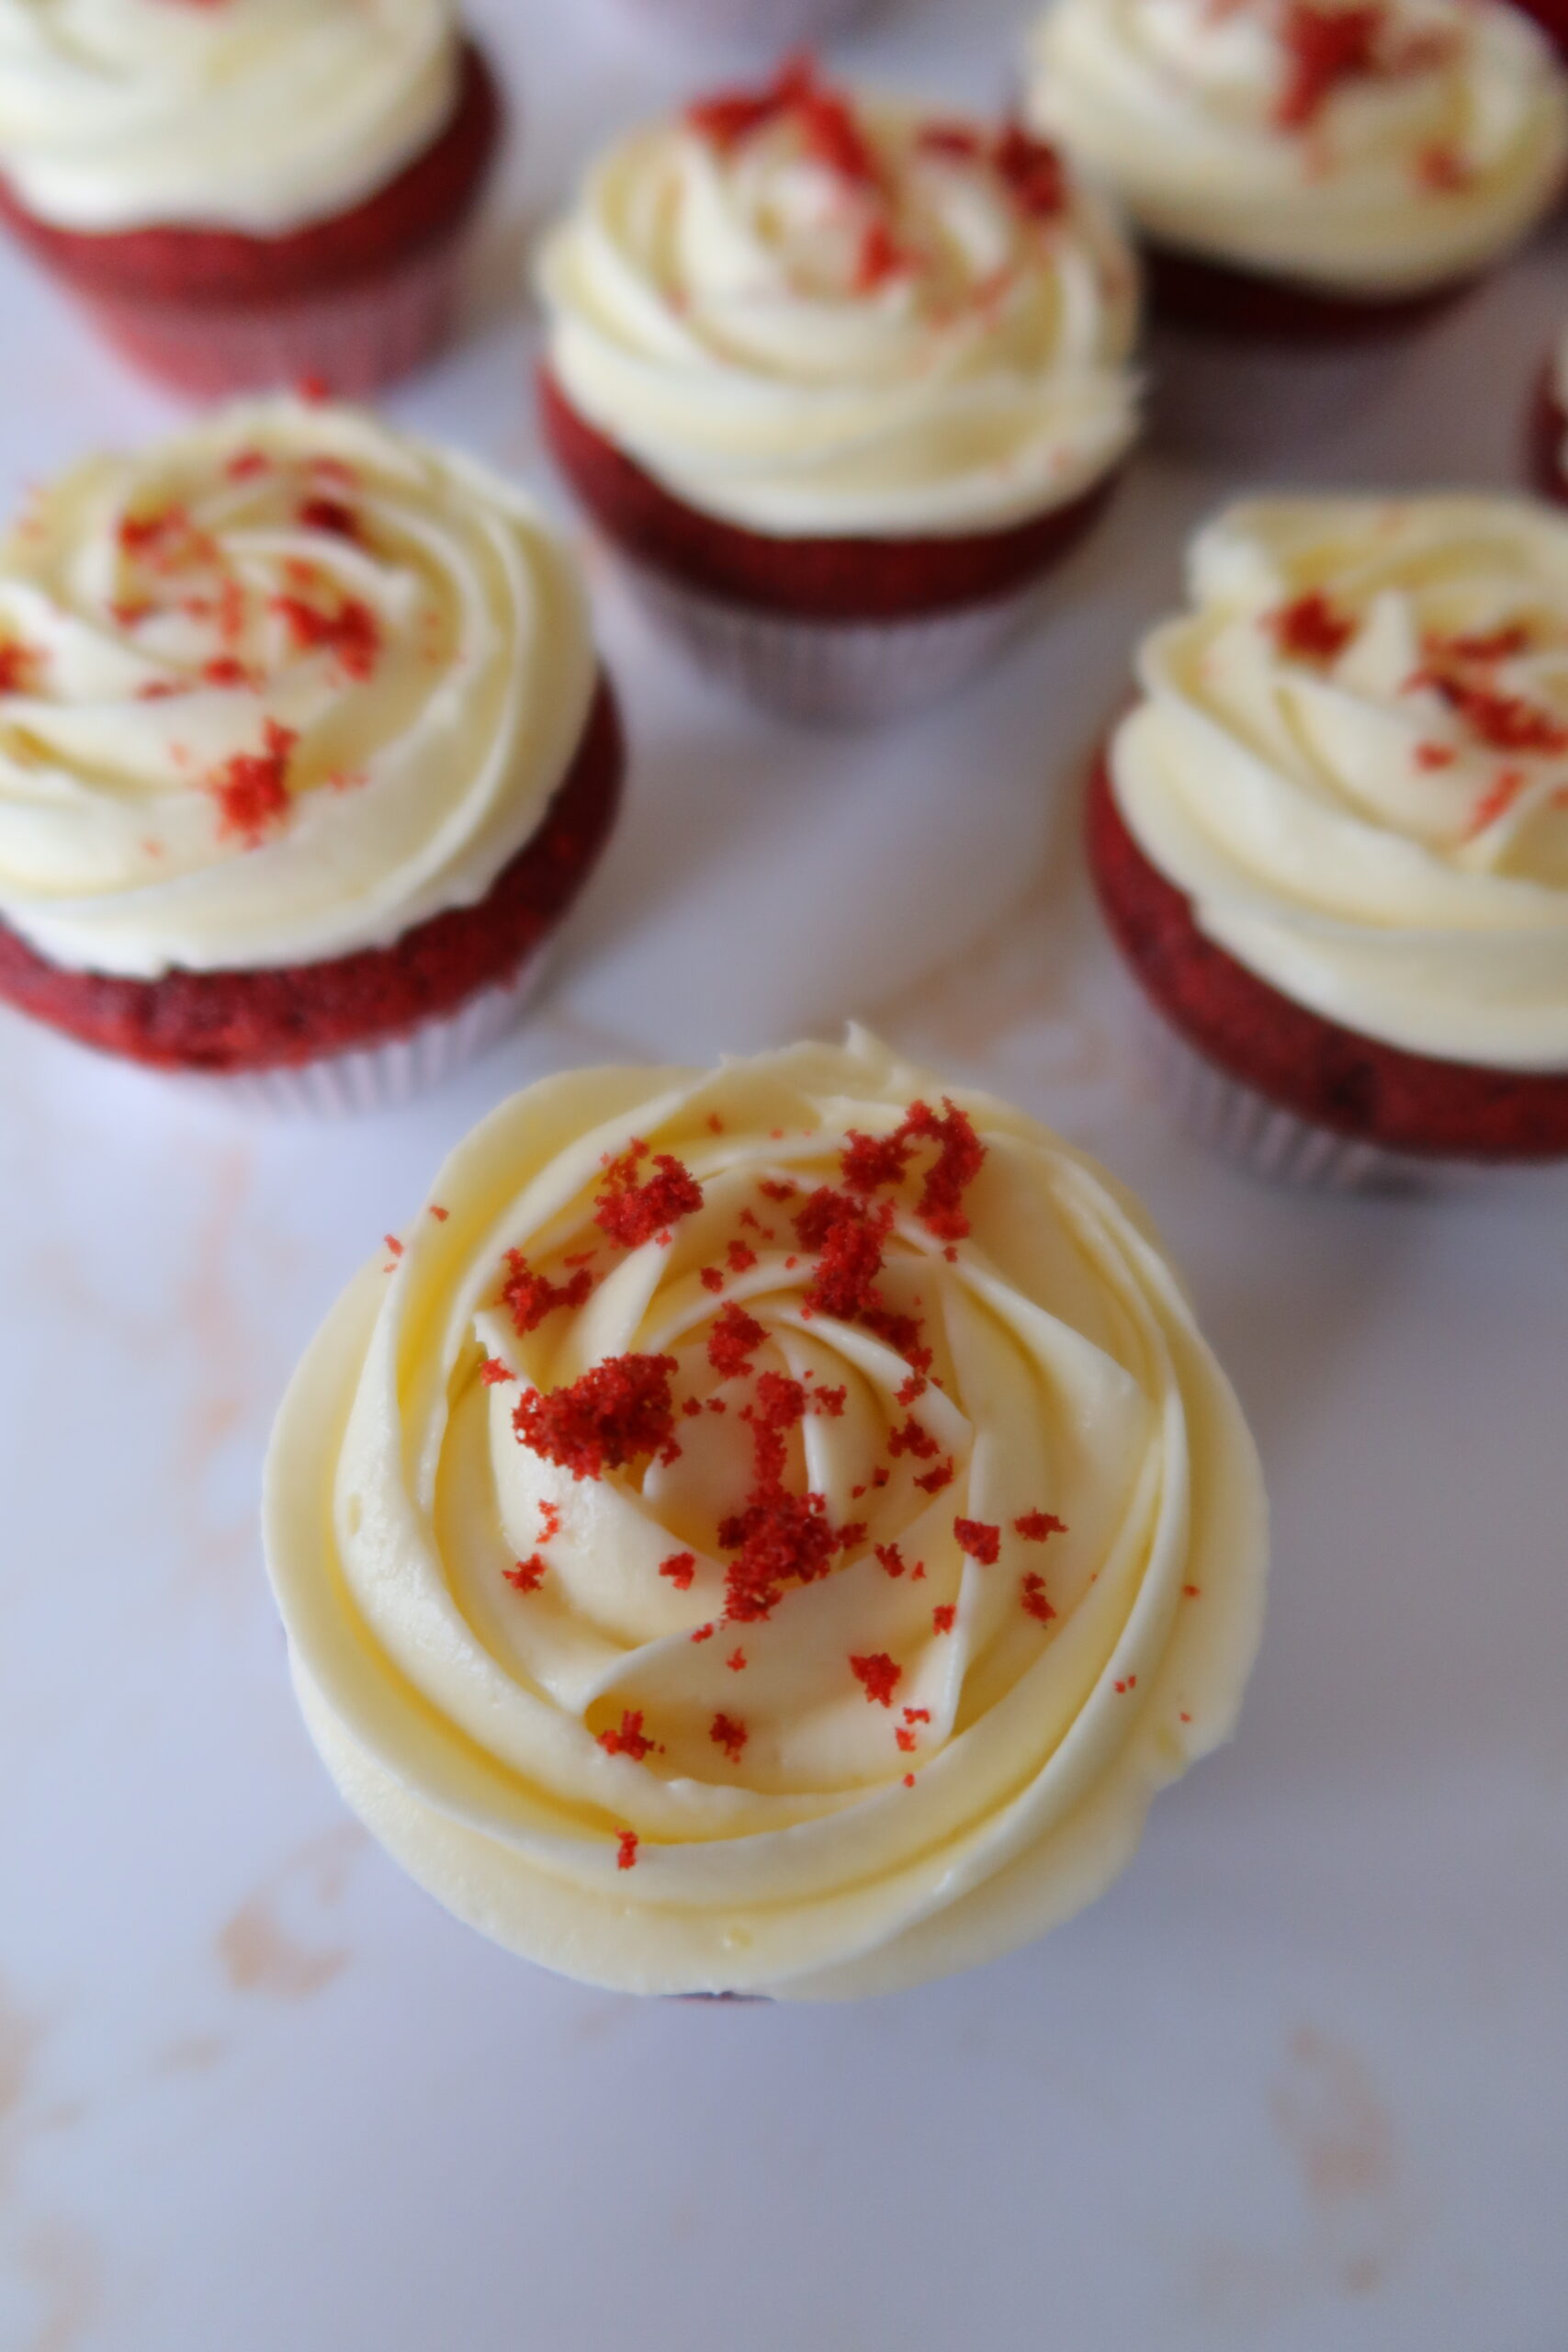
These are the perfect dessert for Valentine’s Day, their striking red colour makes them a popular choice for any special occasions! Red Velvet Cupcakes are traditionally paired with white Cream Cheese frosting which is my favourite type of cake frosting. The frosting can be piped into decorative swirls with a sprinkling of red velvet cake crumbs!
Everything you’ll need
Each ingredient serves a specific function, contributing to the overall texture, flavor, and appearance of the cupcakes. Together, they create a delicious and visually appealing treat that is enjoyed by many.
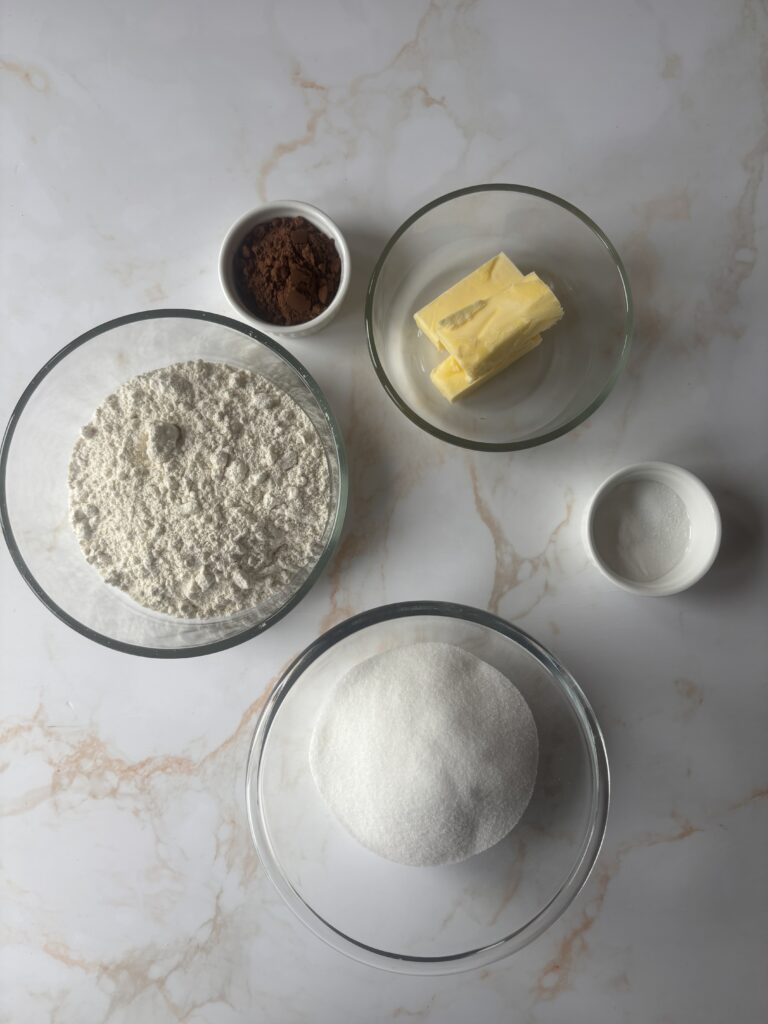
- Plain Flour (150g): This acts as the foundational structure in the cupcakes.
- Cocoa Powder (2 tablespoons): A small amount of cocoa powder adds a subtle chocolate flavor and contributes to the overall color of the red velvet.
- Butter (50g, softened): Provides moisture and richness to the cupcakes. It also contributes to the flavor and helps create a tender crumb when creamed with sugar.
- Baking Soda (1/2 teaspoon): This is a leavening agent that reacts with the acidic ingredients (like buttermilk) to produce carbon dioxide, helping the cupcakes rise and become fluffy.
- Salt (1/4 teaspoon): Enhances the overall flavor and helps balance the sweetness.
- Caster Sugar (200g): This sweetens the cupcakes and provides moisture.
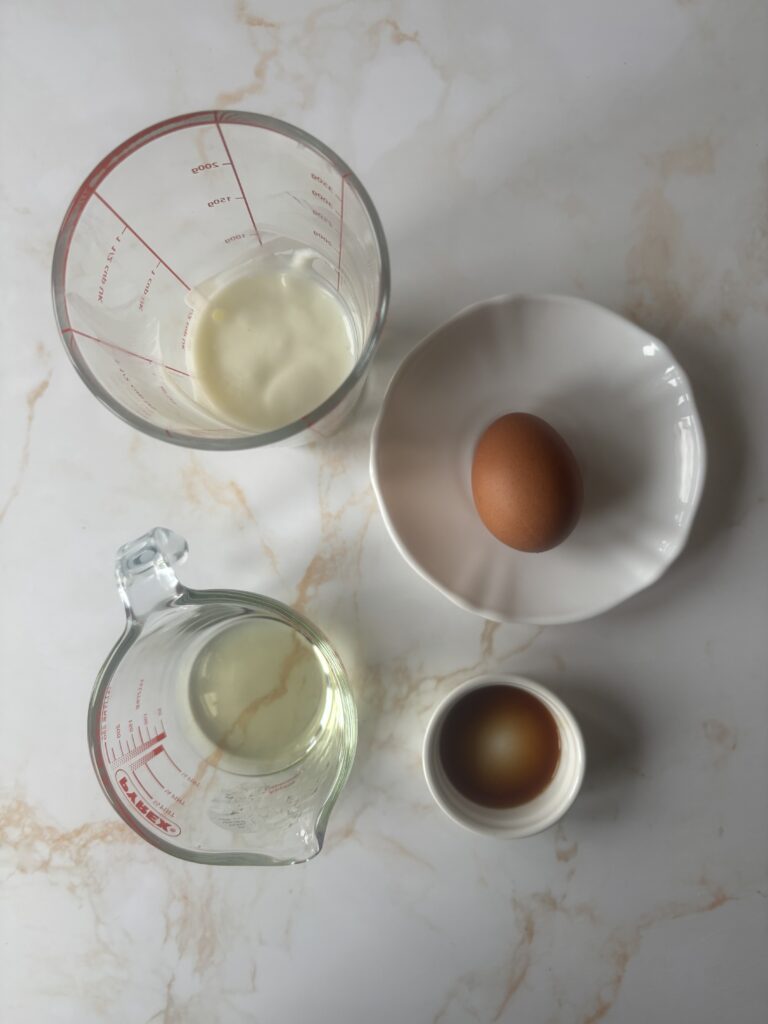
- Egg (1 medium or large): Acts as a binder, providing structure and stability to the cupcakes.
- Vegetable Oil (35ml): Adds moisture and helps keep the cupcakes tender.
- Vanilla Extract (1 tsp): Enhances the flavor profile of the cupcakes
- Red Gel Food Coloring (2 ½ tsp): Gives the cupcakes their signature vibrant red color.
- Buttermilk (130ml, room temperature): Adds moisture, tenderness, and a tangy flavor due to its acidity.


How to Make the cheese cream frosting
- Butter (100g, softened): Provides richness and flavor to the frosting. It also helps create a smooth texture when beaten with the cream cheese.
- Cream Cheese (226g): The primary flavor component of the frosting, adding a tangy richness that perfectly complements the sweetness of the cupcakes.
- Icing Sugar (200g): Sweetens the frosting and gives it the desired sugary consistency. Icing sugar is fine and blends well with butter and cream cheese to form a smooth frosting.
- Vanilla Extract (1 tsp): Adds flavor to the frosting, enhancing the overall taste and balancing the cream cheese’s tanginess.
Prepare your ingredients: Ensure your butter is softened to room temperature for easy mixing. The cream cheese should also be at room temperature to achieve a smooth consistency.
Beat the Butter and Cream Cheese: In a large mixing bowl, add the softened butter and cream cheese.
Using an electric mixer or a whisk, beat them together on medium speed until the mixture is smooth and well combined. This usually takes about 2-3 minutes. Make sure to scrape down the sides of the bowl occasionally to ensure everything is mixed thoroughly.
Add the icing sugar: Gradually add the icing sugar to the butter and cream cheese mixture. It’s best to do this in batches to prevent the sugar from flying everywhere.
Beat on low speed initially to combine the sugar, then increase the speed to medium. Continue beating until the frosting is smooth and fluffy. This should take about 2-3 minutes. Pour in the vanilla extract and mix until fully incorporated. This will enhance the flavor of the frosting.
Adjust Consistency (Optional): If the frosting is too thick, you can add a teaspoon or two of milk or cream to reach your desired consistency. If it’s too thin, you can add a little more icing sugar until it thickens up.
Frosting the cupcakes: Once the cupcakes are completely cooled, use a piping bag fitted with a decorative tip or a spatula to apply the cream cheese frosting generously on top of each cupcake.
I use 1M tip from Wiltons, start from the middle of the cupcake, move the tip in a circular motion, working from the center outward. Continue applying pressure as you move the tip in a circular motion. Go around the cupcake, working your way outward to create layers. This motion creates the characteristic rosette shape.
Recipe Tips
Cocoa Powder: Choose high-quality unsweetened cocoa powder, as it contributes to the flavor.
Gel Food Coloring: Use gel food coloring instead of liquid coloring for a more vibrant red hue without adding extra moisture to the batter. I like to use the progel food colouring.
Chill Frosting: Consider chilling the frosting briefly if it’s too soft to maintain its shape when piped.
Choosing the right piping tip: A star tip, such as Wilton 1M or 2D, creates beautiful swirls and rosettes. The open star design provides texture and volume to your frosting.
More Cake and Cupcake Recipes:
Red Velvet cupcakes with Cream Cheese Frosting
Ingredients
- 150 g plain flour
- 2 tbsp cocoa powder
- 50 g butter softened
- ½ tsp baking soda
- ¼ tsp salt
- 200 g caster sugar or granulated
- 1 egg large or medium
- 35 ml vegetable oil
- 1 tsp vanilla extract
- 2 ½ tsp red gel food colouring
- 130 ml buttermilk room temperature
Cream cheese frosting
- 100 g butter softened
- 226 g cream cheese Brick style or Philadelphia
- 200 g icing sugar
- 1 tsp vanilla extract
Instructions
- Preheat your oven to 170°C (340°F). Line a 12-cup muffin tin with cupcake liners.
- In a medium bowl, whisk together the plain flour, cocoa powder, baking soda, and salt. Set aside.
- In a large bowl, cream together the softened butter and caster sugar using an electric mixer on medium speed until light and fluffy, about 2-3 minutes.
- Beat in the egg until well combined. Add the vegetable oil, vanilla extract, and red gel food coloring, mixing until evenly incorporated.
- Gradually add the dry ingredients to the wet mixture, alternating with the buttermilk, starting and ending with the dry ingredients. Mix until just combined. Be careful not to overmix.
- Divide the batter evenly among the cupcake liners, filling each about two-thirds full. Bake in the preheated oven for 20-22 minutes, or until a toothpick inserted into the center of a cupcake comes out clean.
- Allow the cupcakes to cool in the tin for about 5 minutes, then transfer them to a wire rack to cool completely.
Cream cheese frosting
- In a medium bowl, beat together the softened butter and cream cheese until smooth and creamy.
- Gradually add the sifted icing sugar, mixing on low speed until well combined.
- Stir in the vanilla extract until smooth.
- Once the cupcakes are completely cool, frost them with the cream cheese frosting using a piping bag or a spatula.
- Enjoy your delicious red velvet cupcakes with cream cheese frosting!